When troubleshooting your printer, printing a test page can be a quick and easy way to ensure everything is working.
It does not matter if you are new to Mac or just need a refresher; I will show you how to print a test page on a Mac using my step-by-step guide.
Mac computers have a TEST A PRINT PAGE service you can use to print a test page.
Jabran here, and today I’m excited to show you how to print a test page on your Mac!
This method works on any printer, including Brother, HP, Canon, Samsung, Epson, Pantum, Kodak, Lexmark, etc.
How to Print a Test Page from a Mac – Quick
Turn on your printer and load a page > On your Mac, select Apple Logo > System Preferences > Printers & Scanners > Options & Supplies > Utility > Print Test Page > OK.
You are just a few clicks away from testing your printer confidently. So let’s get started.
How to Print a Test Page from a Mac
Here are the steps you need to follow to print a test page from your Mac:
- Switch on your printer and insert a blank page.
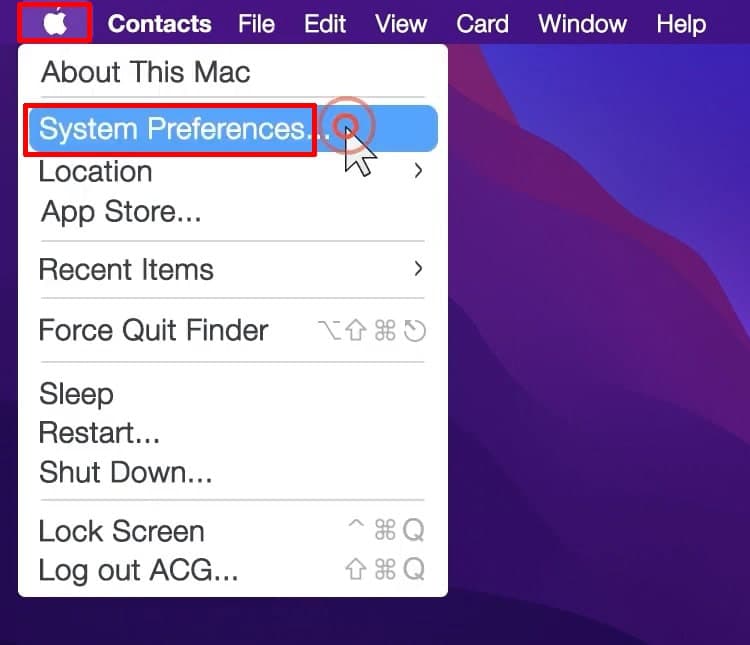
- Click the Apple logo at the top left of your desktop, then select System Preferences.
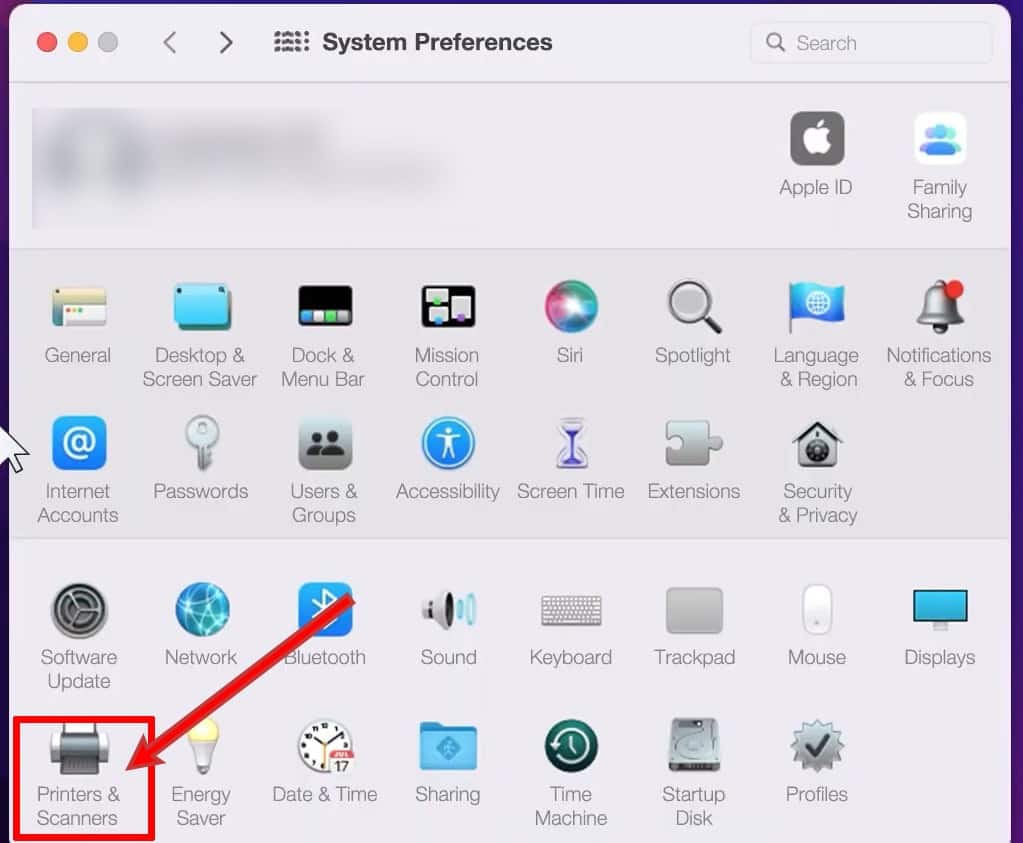
- Select Printers & Scanners. This will show a list of connected printers.
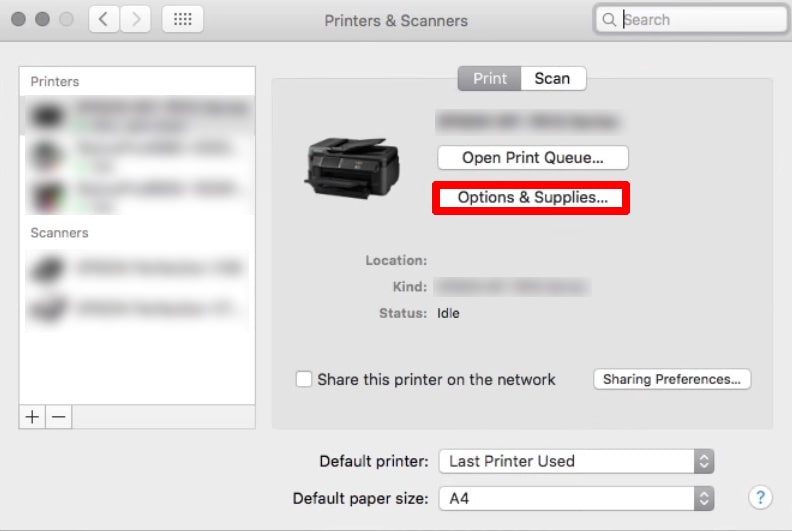
- Choose the printer from which you wish to print a test page, then click “Options & Supplies.” This will open a pop-up window displaying the name of your printer.
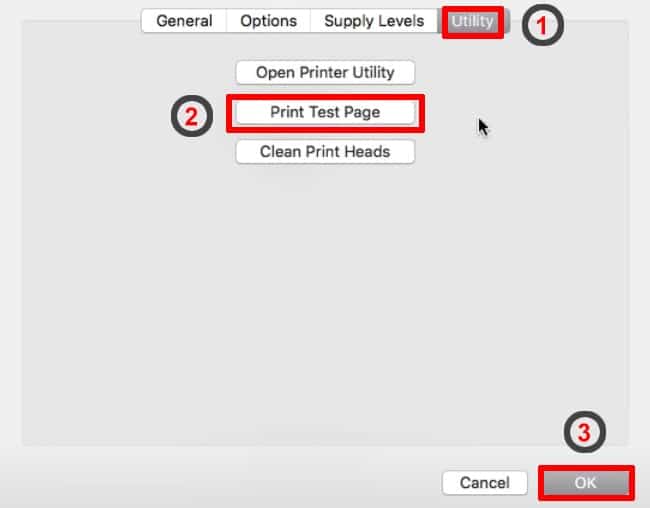
- Switch to the “utility” tab, select “Print Test Page,” then click “OK.” Your Mac will then print a test page.
Wrapping UP!
As you can see, printing a test page from a Mac computer is much simpler than using a Windows computer. With Mac OS, you can print your test page effortlessly because this feature is available by default.
A test page can help you identify any printer issues or verify your printer’s connection.
Now that you’ve learned how to print a test page on a Mac computer, you can continue printing the rest of your documents.


