In this post, I will explain how to easily remove printer from HP Smart App.
If you want to sell your old printer or gift it to your friend, you must remove yourself from the HP Smart program so that your friend or another person can use the HP Instant Ink program or cartridges.
So if you no longer own the HP Smart printer, it’s time to remove it from your account.
This post will guide you step-by-step no matter why you want to remove your printer from the HP Smart account.
Note: HP Smart account is required to enroll in HP Instant Ink. Therefore, if you have enrolled in HP Instant Ink, you must cancel the subscription before removing the printer.
Steps To Remove Printer From HP Smart Account
Below are the steps to remove the Printer from HP Smart Account;
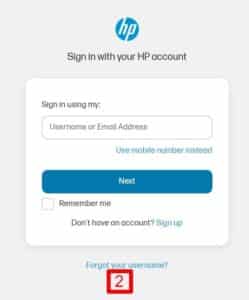
- To remove a printer from your HP Smart Account, go to hpsmart.com and click on sign-in.

- Enter your Email Address, and select next. Then enter your password and again click on Next.

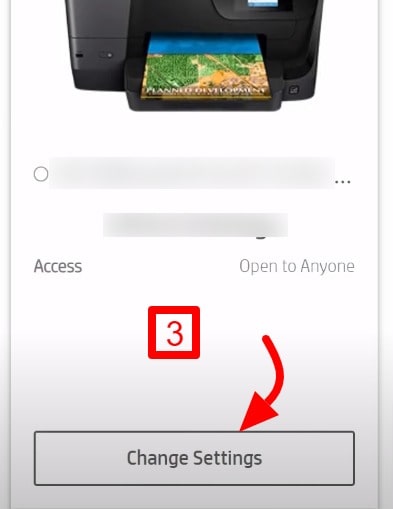
- It will display a list of connected printers; choose the printer you want to remove and click “Change Settings.”

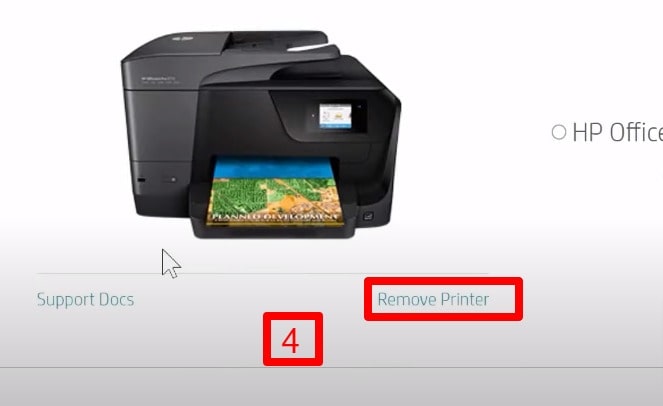
- Click remove Printer.

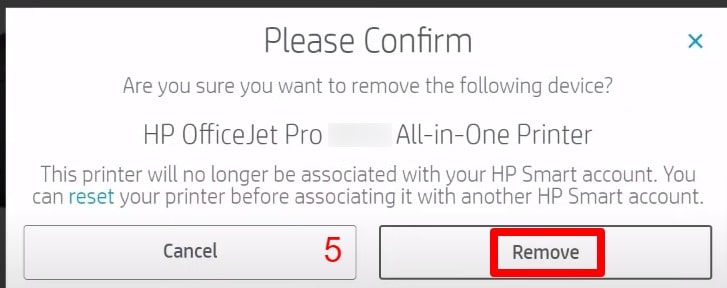
- Once you have verified the printer is correct, click “Remove.”

- As a result, your printer is now removed from your HP Smart Smart.
NOTE
You can follow the above instructions on the HP Smart app, but I wouldn’t recommend it since it doesn’t work. It is better to remove the printer through the HPSmart website.
However, if you have removed the printer from your HP Smart account and it’s still showing in your HP Smart App, you have to delete it from HP Smart App as well.
Once you remove the printer from your HP Smart account, it will be automatically removed from your HP Smart App.
But for some reason, if it’s still synced in your HP Smart App, you should follow the below steps to delete your printer from the HP Smart App.
Guide To Remove Printer from HP Smart App
Follow the below steps to delete HP Printer from the HP Smart App:
- First, open the HP Smart App on your Phone, laptop, or tablet.
- Login to your account by clicking the Sign-in button and filling in your credentials.
- Now click on the Printer Icon in the left bar.
- Click on Select a different printer, and wait for it to load all your listed printers.
- On the right side, click on Remove Link to remove the printer from HP Smart App.
- Finally, “X” will appear next to the printer you want to remove; click on it. Now it will show you “Done” instead of “Remove.”
- Now refresh the app, or close it and open it again to see changes. Your old printer will no longer be shown in your HP Smart App.
Note: For some reason, if you cannot remove the printer from HP Smart App. Then click the Window key on your keyboard > search for HP Smart App > right-click on it > and select Uninstall to remove the app from your computer.
Now reinstall the HP Smart App from the Microsoft store and add your existing printer. This way, your old printer will no longer be showing in the HP Smart App.
Bottom Lines
I hope you learned how to remove your printer from HP Smart App. As you saw, it was just a matter of 5 simple steps.
However, if you receive warnings such as “Cannot Remove Printer,” this is because you are enrolled in the “HP Instant Ink” program. So first, cancel your Instant Ink subscription program before removing your printer.
