
To add a printer to a Chromebook, your printer and Chromebook must be connected to the same Wi-Fi network. Afterward, you need to open your Chromebook’s settings panel and click on Add printer to add your printer.
However, sometimes, your Chromebook can’t recognize your printer on the network, which creates problems. In this case, manually adding your printer to your Chromebook would help.
You can also connect your wired printer to your Chromebook. Even though there are no drivers available for Chromebooks, this can be done without installing drivers, which is a little bit easier.
In this article, I will show you how to quickly set up a wired or wireless printer on a Chromebook.
How To Add Printer To Chromebook – At a Glance
- Connect your Chromebook and printer to the same Wi-Fi network.
- Go to your Chromebook > Click Clock (Time) > Setting Icon > Advance > Printer > Click Save or Setup next to your printer.
If your printer is not automatically detected, you may need to add it manually. So click on the add printer icon and enter your printer’s IP address or hostname.
This method will work on all wireless and wired printers such as HP, Canon, Brother, Epson, and Lexmark.
Chromebook uses a cloud-based operating system that mostly relies on the internet. Therefore, connecting a wireless printer to a Chromebook is pretty straightforward.
However, I’ll also walk you through adding a wired printer to your Chromebook without wireless capabilities.
Table of Contents
Prerequisites for adding a wireless printer to Chromebook
To establish a successful wireless connection between Chromebook and printer, you must complete the following steps:
- Connect your Chromebook and wireless printer to the same Wi-Fi network
- Know the IP Address of your printer (optional)
Note: Your Chromebook and printer must be connected to the same wireless network. Otherwise, you will not be able to add your printer to your Chromebook.
In case you don’t have a wireless network, skip these options and go straight to how to add wired printers to the Chromebooks section of this guide.
If you don’t know how to connect your wireless printer to the network, click here! I’ve already covered that in a previous article, which varies from printer to printer. I’ll cover the basic idea below.
Connect your Printer to a Wireless Network
First, you will need to connect your printer to the wireless network.
If your printer is not already connected to the wireless network, follow these steps.
Connect the printer to Wi-Fi (touchscreen Printer)
- First, turn on your printer and access the printer menu.
- Choose Wireless/setup/network setup or wireless setup wizard.
- Select the name of your network and enter your password to connect to the wireless network.
Note: If you don’t see those options, choose Wi-Fi-protected Setup or WPS PIN, click Push Button on the touchscreen, and follow the instructions on the screen to connect your printer to the wireless network.
Connect the Printer To Wi-Fi (Without Touchscreen)
If your printer does not have a touchscreen, you can use a Wi-Fi-protected Setup (WPS) method to establish a wireless connection between your printer and router.
Depending on your printer, here are the steps:
- For most printers, press and hold the Wireless button for five to six seconds until the wireless button light starts flashing.
- For some printers, you may need to press and hold the wireless button and power button (on the back of the printer) together for five to six seconds to enter WPS connection mode.
- Within 2 minutes, press and hold the WPS button on your router until it starts blinking, then remove your fingers and wait for it to process the WPS connection.
- After that, your printer should now be connected to your wireless network. Now you can add it to your Chromebook.
Note: The above steps can vary from printer to printer, so you should refer to your printer manufacturer’s guide for connecting your wired or wireless printer with your router. Here, I’ll assume that your printer is already connected to your router and is ready to be added to your Chromebook.
There are several other methods that you can use to connect your printer to a Wi-Fi network. Alternatively, you can use the printer’s mobile app.
How to add your printer to a Chromebook
To add a printer to your Chromebook, follow the below steps:
- First, log in to your Chromebook and connect it to the same network (Wi-Fi) as your printer.
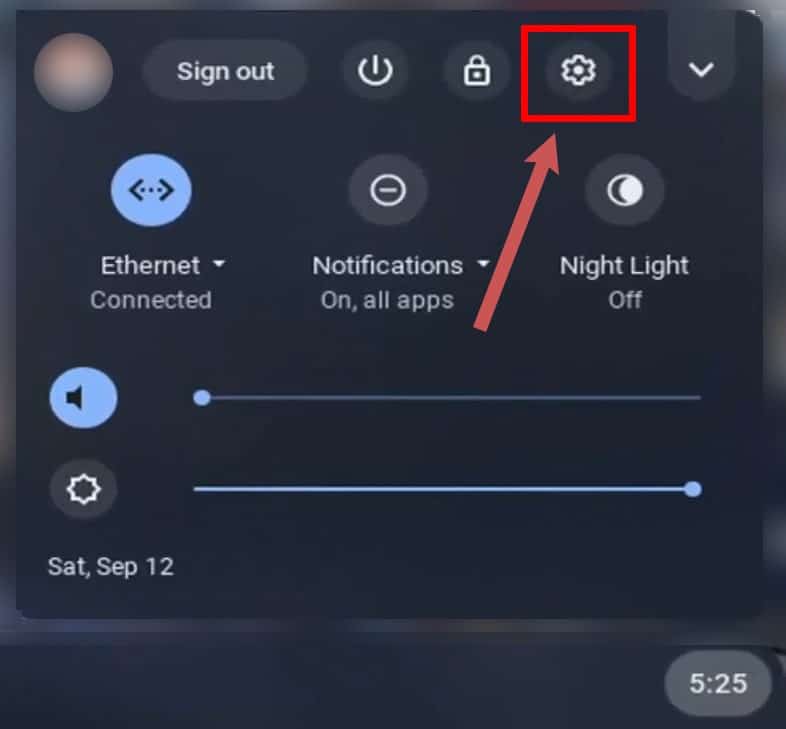
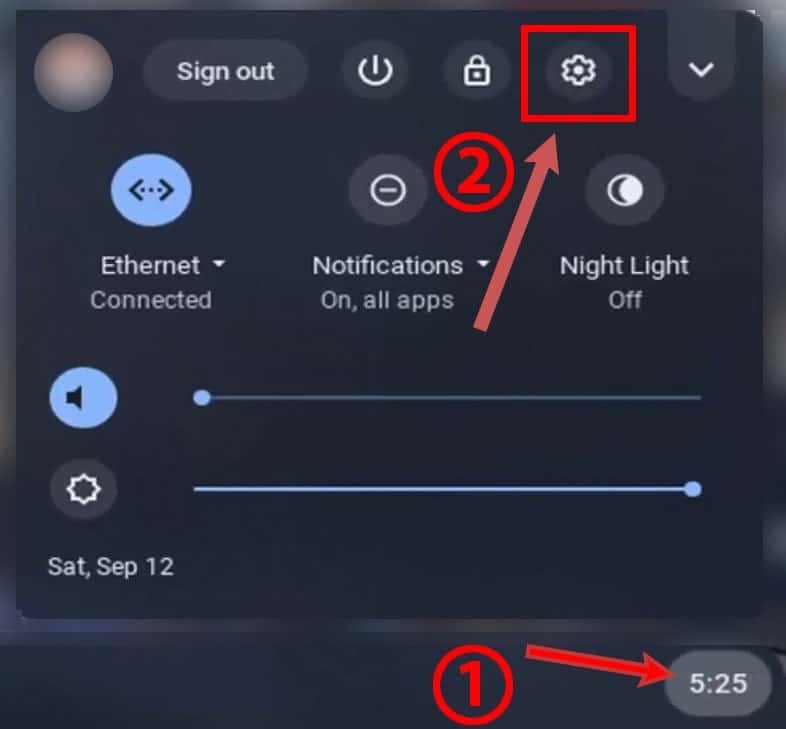
- Now, click on the clock in the bottom-right corner of the desktop.

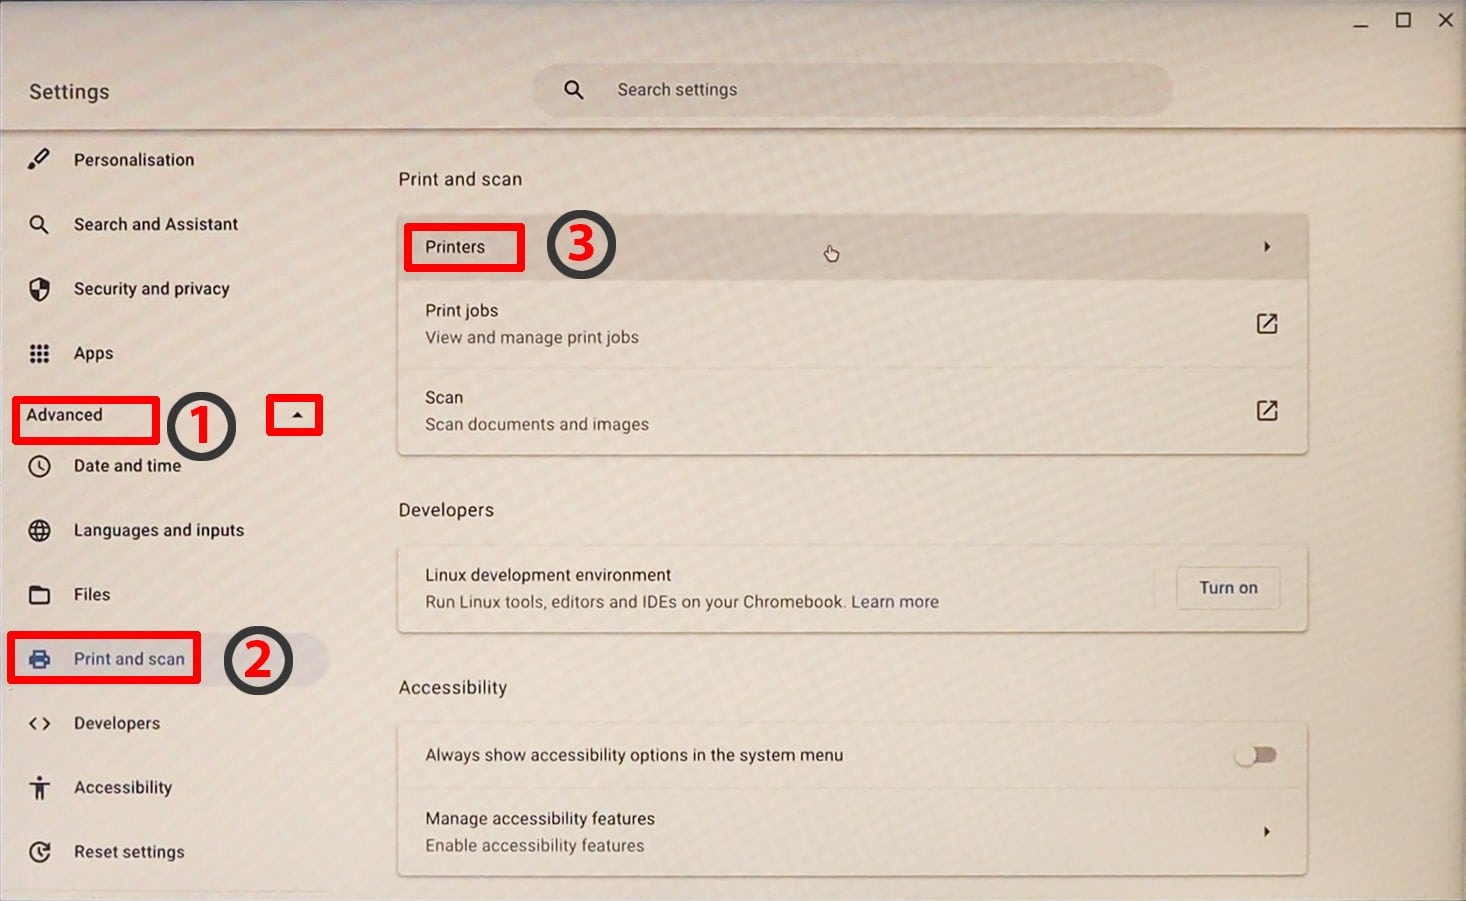
- Click on the settings icon to access the setting panel of your Chromebook.
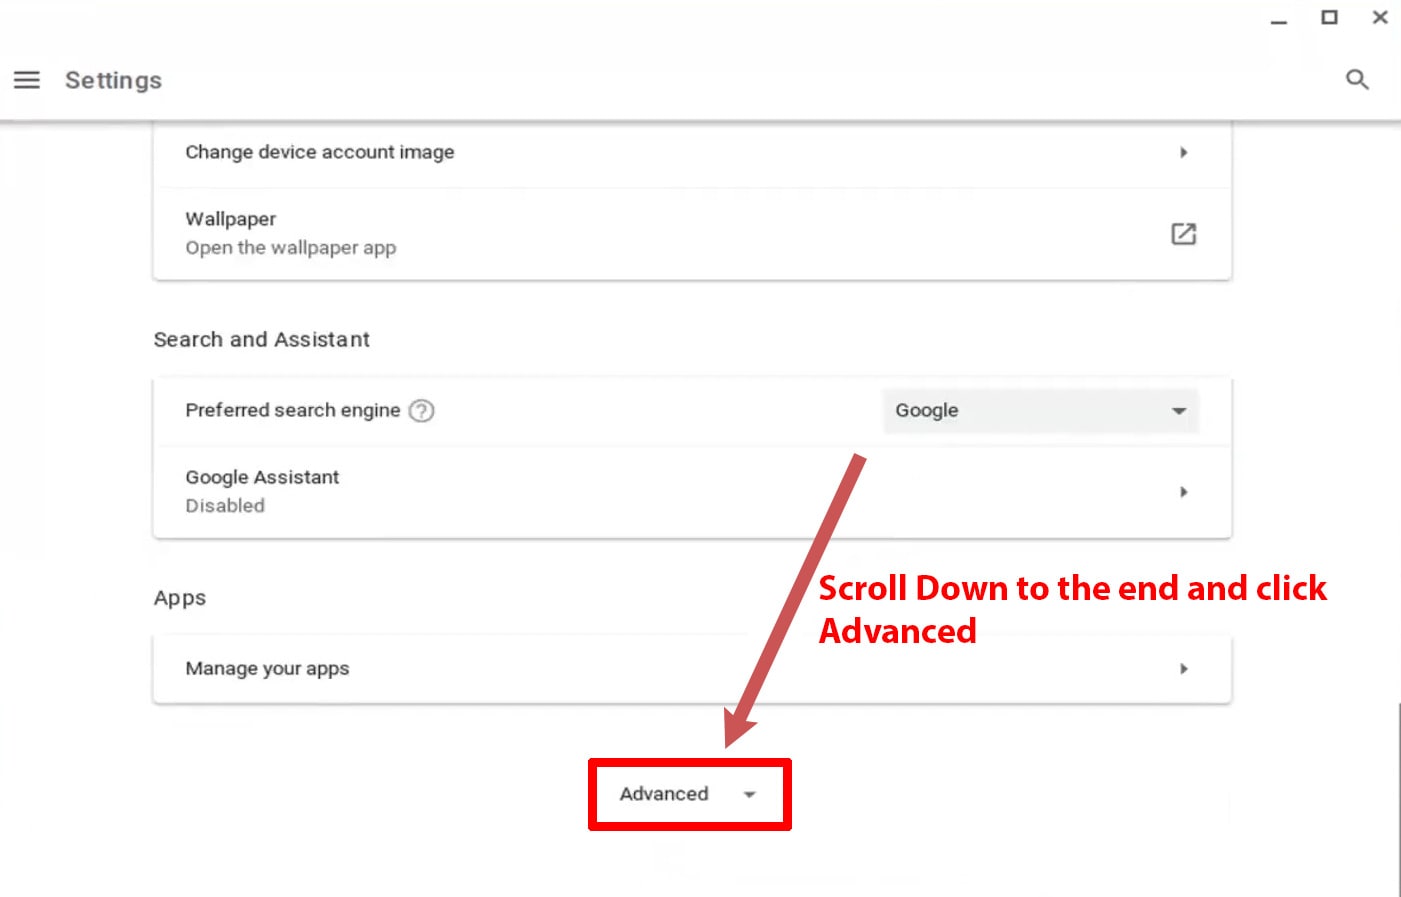
- Scroll down to the bottom, and click on “Advance.”
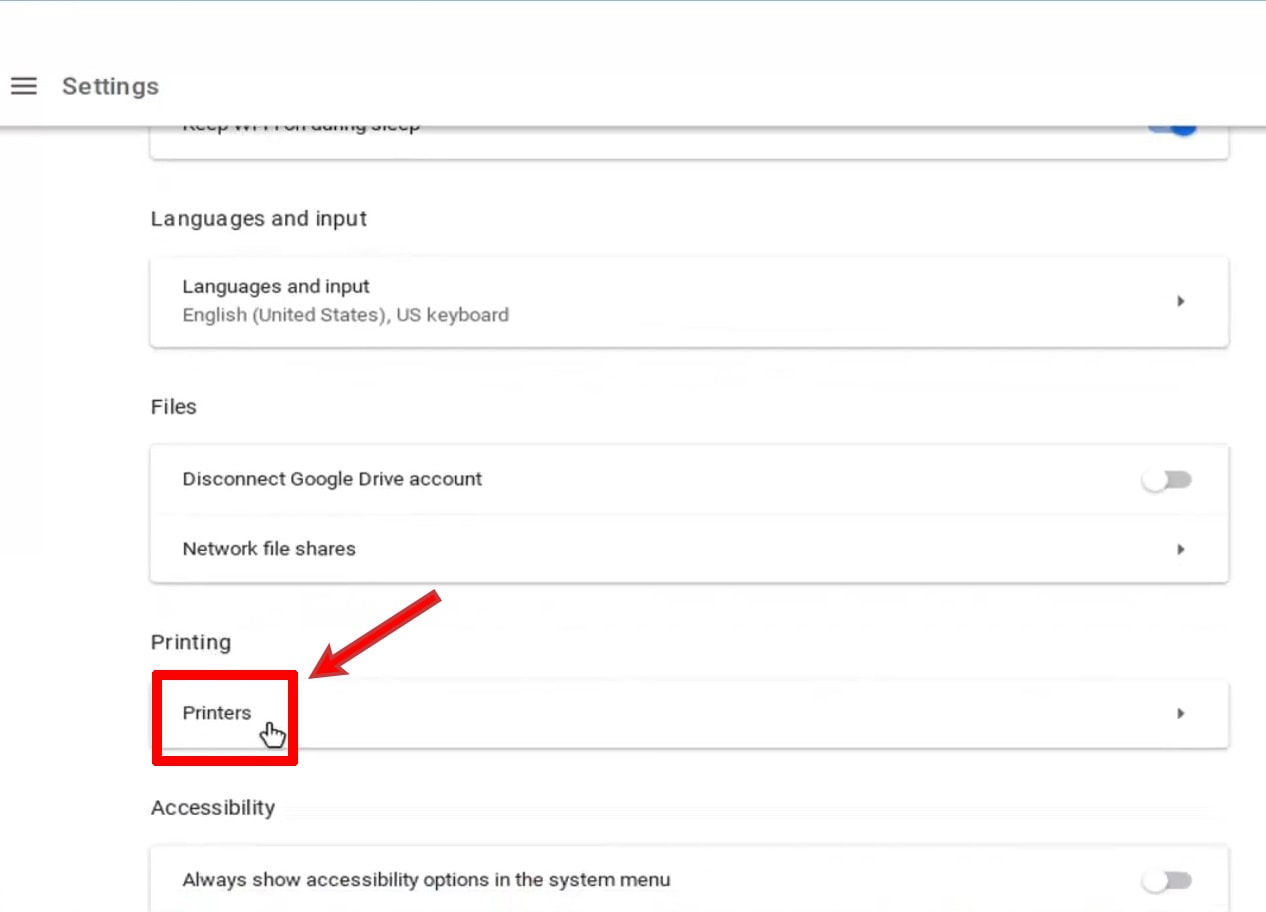
- Now again, scroll down and select “Printer.”
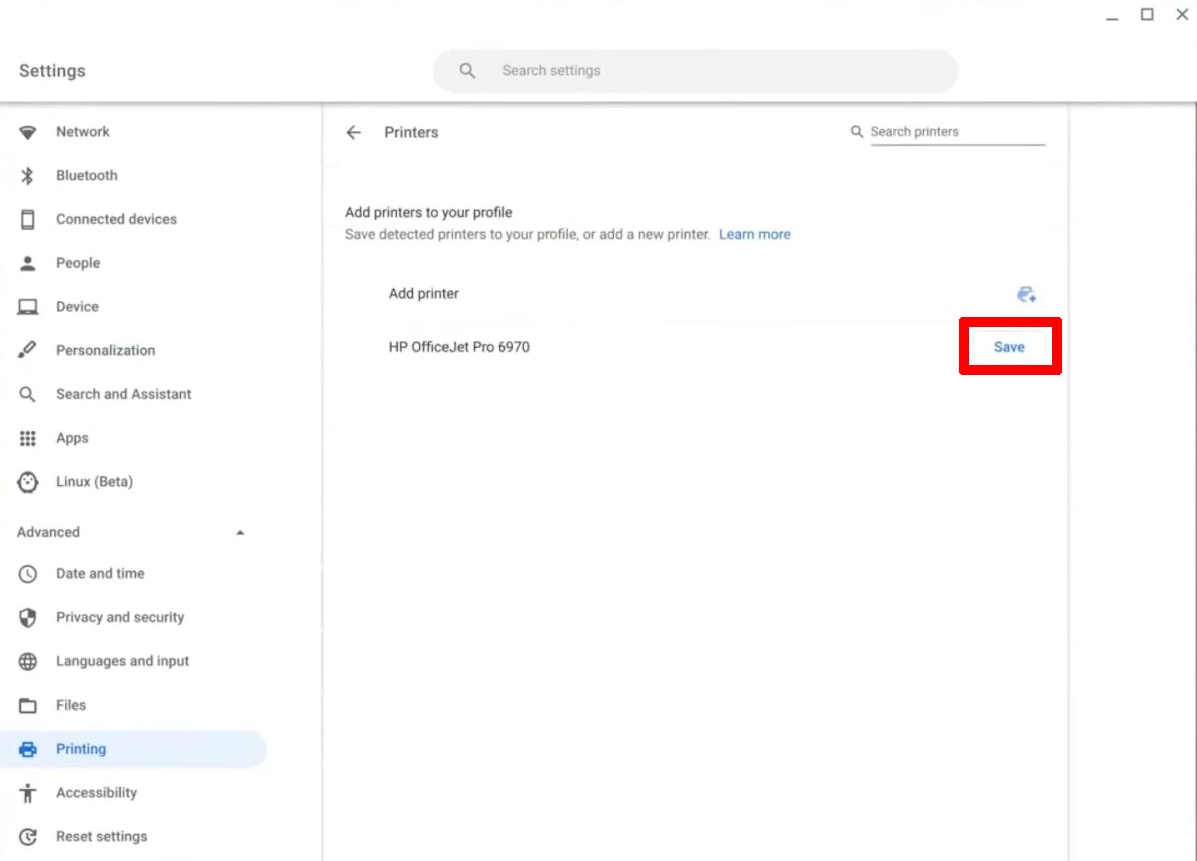
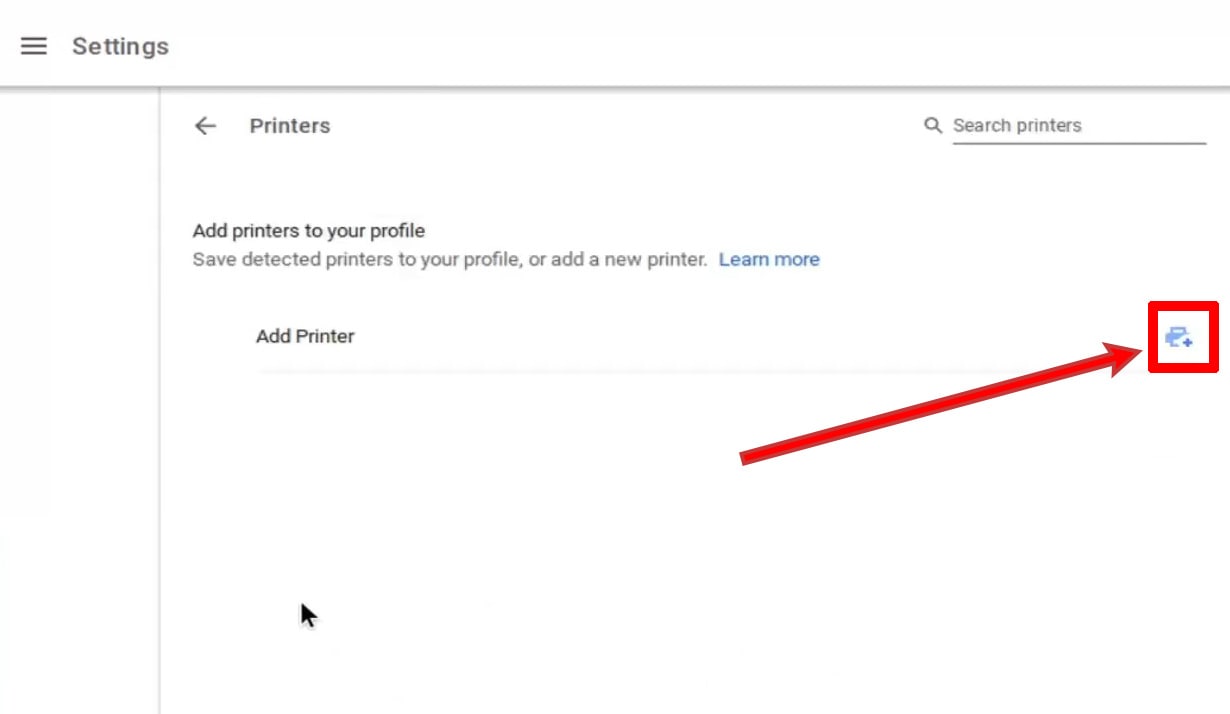
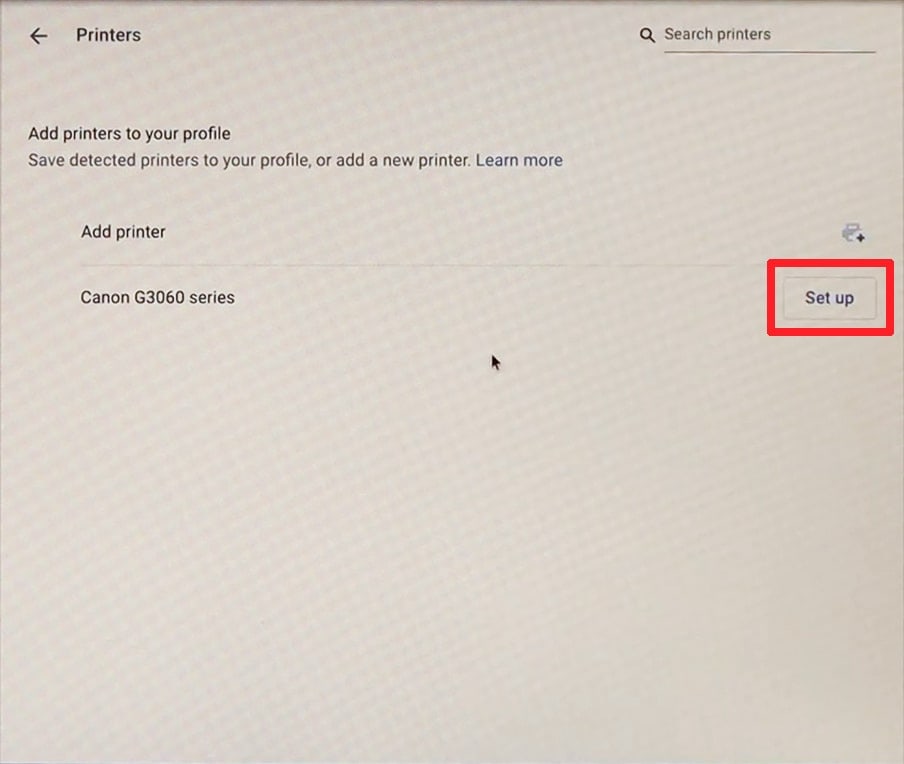
- On this page, you should see all the available printers on the network; click on “setup” or “save” next to the printer name to set up the printer on your Chromebook. If you can’t see your printer here, follow the next step.


Ensure your printer and Chromebook are connected to the same network. But if the printer doesn’t appear on your Chromebook, follow the steps below to add it manually.
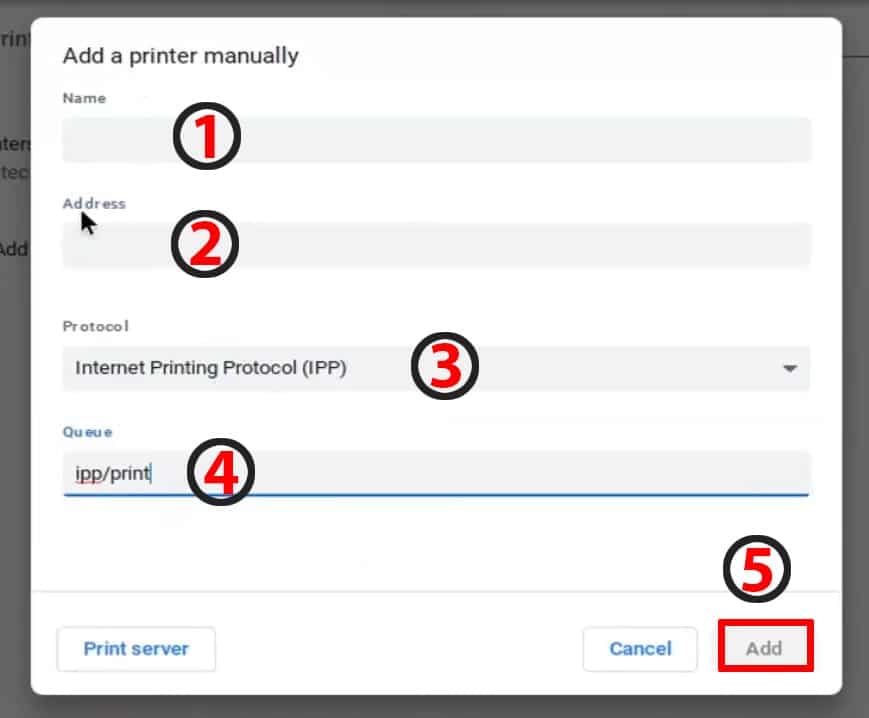
- Click on the “Add Printer icon.” It will ask you for some basic information about your printer.
- In the first field, type the name of your printer and its IP address. You can find the IP address of your printer on the back of the printer or by printing the network configuration page.
- Select “Internet Printing Protocol (IPP)” from the protocol and ipp/pp in the queue section.
- Then click Add and your printer should now appear as a Saved printer. The printer is now connected to the Chromebook.

Print a test page to verify the connection
Below are steps to print with your newly connected printer:
- Turn on your printer, and load some paper into the tray.
- Open your favorite document editors, such as Microsoft Word or Google Docs on your Chromebook.
- Press CTRL + P to open the print dialogue window.
- In the destination, select your printer. If it’s not showing there, then click “See more.”
- Now, click on your printer, and it will be selected.
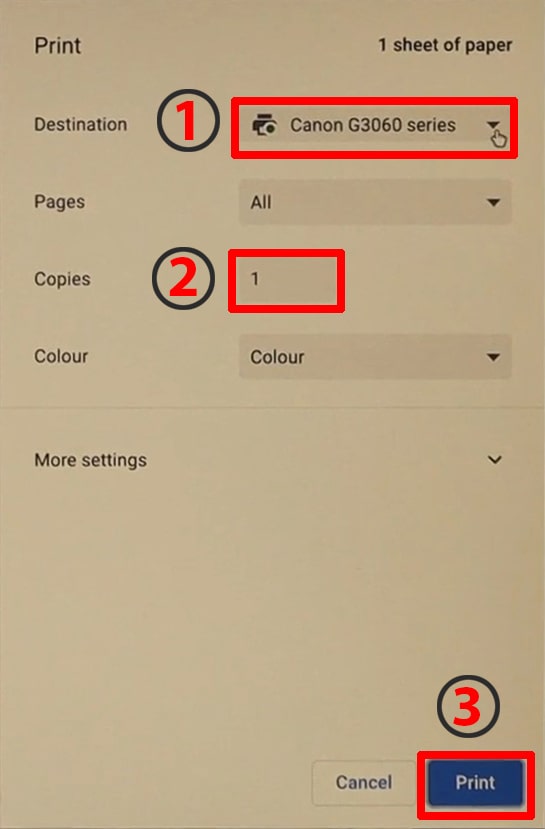
- Then click on print.
- If your printer starts printing, this indicates that your connection was successful, and your printer is connected to the Chromebook. You can now print from your Chromebook using your printer.

How to Add a Wired printer to a Chromebook
There is no need to worry if you do not have a wireless printer because Chromebook also supports wired printers.
A wireless connection is a convenient way to print with a Chromebook. However, some old printers lack wireless capabilities. If you have trouble connecting wirelessly, consider a wired connection.
For this, you would need the following:
- USB Cable
Get an appropriate USB cable and attach one end to your Chromebook and the other to your printer.
The majority of Chromebooks require standard USB cables, but some of the latest models come with USB type-C cables. So if you don’t have a USB-C cable, you can use an adapter.
Some printers require USB-to-USB cables, but others might need USB-to-printer cables. So make sure you have a suitable cable to connect your printer to your Chromebook.
Below are the steps to add a wired printer to a Chromebook:
- Connect your Chromebook to your printer with a USB cable.
- A pop-up might appear asking you to set up your printer; click on it > Select Add Printer and follow the instructions. If you are not getting the pop-up message, follow the next step.
- Click on the clock > Select setting.
- On the left side of the window, expand the Advance option or scroll down to Advance. Then Print and Scan > Printer.
- Your wired printer will be available here; click on the Setup. As a result, your printer will be successfully connected to your Chromebook.
- Finally, print a test page to verify the connection.


How to Fix the wireless printer connected to Chromebook but not printing?
If you have added a printer to your Chromebook, but for some reason, it doesn’t allow you to print, follow the steps below to fix this issue.
- On your Chromebook, click the clock icon > select setting icon > Advance > print and scan > printer and select Edit the saved printer.
- Change the port number at the end of the IP address to “:9100” or “:8080”. Make sure to enter the colon (:) and port number without double quotes.
- Change the protocol from Internet Printing Protocol (IPP) to “AppScoket (TCP/IP).” This should fix your printing issue.
Wrapping Up!
Adding your printer to a Chromebook is relatively straightforward compared to windows and Mac operating systems.
You do not need to install any drivers to connect a wireless printer to a Chromebook. All you have to do is connect them both to a Wi-Fi network. Connecting a wired printer to a Chromebook is also as simple as it sounds.
Hopefully, your printer is now connected to your Chromebook, and you are ready to print.