In this article, I’ll show you how to connect Canon printer to your wireless network and help you establish a wireless connection between your computer/laptop and printer.
In case you have just purchased a wireless Canon printer but cannot make it work within your wireless network, here are four quick ways to connect your Canon wireless printer to your WiFi network.
Wireless printers have instantly made printing a breeze, but when it comes to connecting them to your wireless network, they need to be clarified. However, I have simplified it for you!
I’m Jabran, a printer expert – and today, I’m excited to show you how to connect Canon printer to WiFi easily!
Table of Contents
Methods to Connect canon wireless printer to WiFi
There are four different ways you can use to connect any Canon printer to a wireless network:
- WPS Push button method
- Using the Canon Print App (Smartphone method)
- WPS Pin method
- Manually establish the wireless connection
The steps below can be used on any Canon printer, regardless of whether it has an LCD, control buttons, or a touch screen. There is a section for each type of Canon printer according to whether or not it has an LCD.
#1 Use WPS Button To Connect Wirelessly
The WPS Push button is the most straightforward method to connect any Canon printer to a wireless network. In this case, you will need to push the WPS button on your router to connect your printer to the network.
Please note that not all routers have a WPS button, so check with your router’s manufacturer.
Here are the steps to connect the Canon wireless printer to WiFi using the WPS Push button:
- Turn on your printer and router but ensure that your printer is placed within range of the router. This means you have to be near the router.
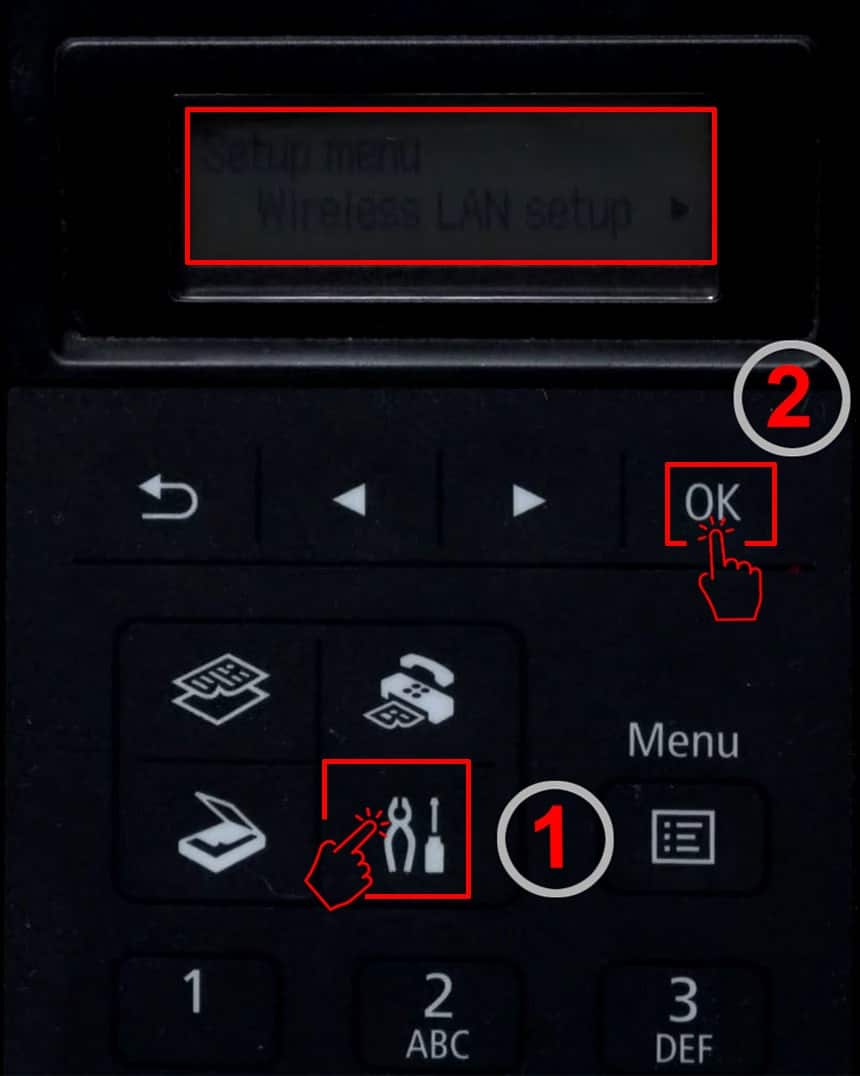
- Press the Setting button, navigate to Wireless LAN Setup using the direction keys, and click OK.
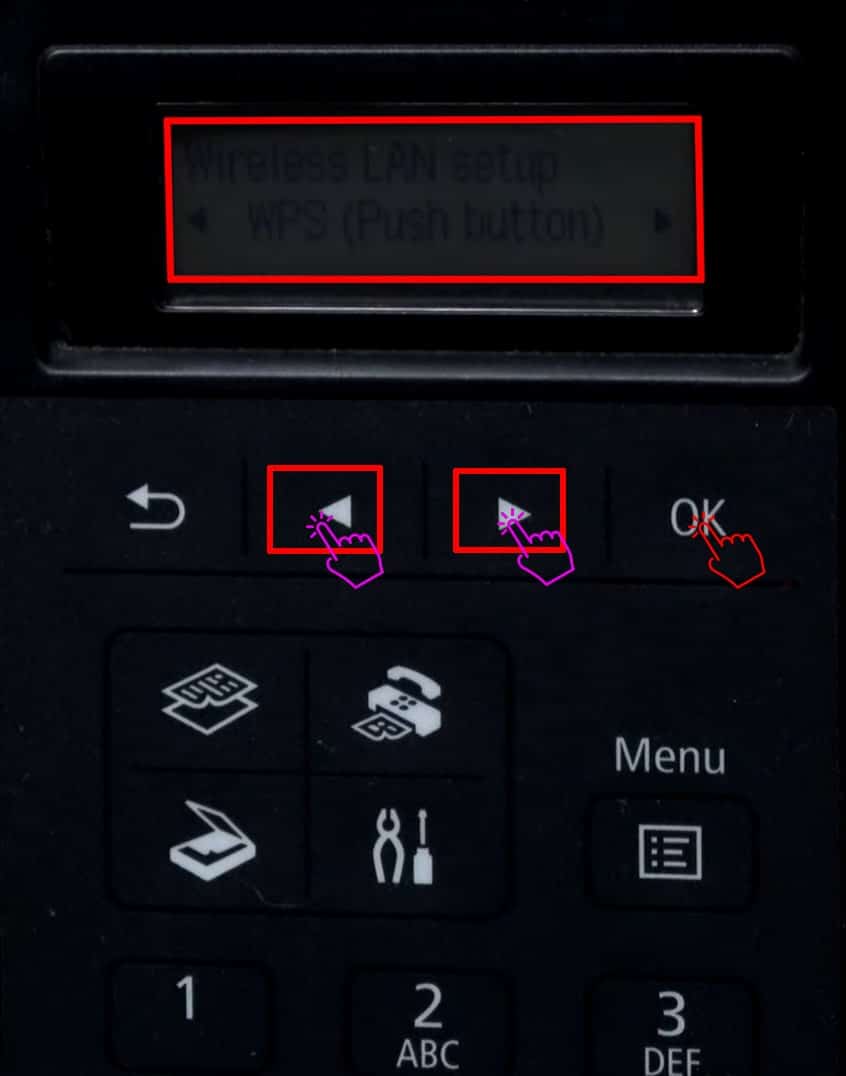
- Once again, use the direction buttons, select WPS (PUSH Button), and click the OK button twice. Following that, you will see Connecting… on the screen.
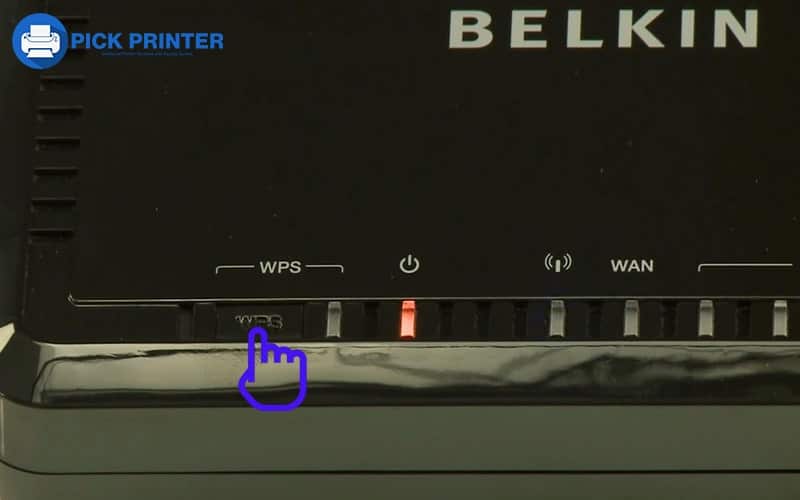
- Within two minutes, hold the WPS button on your router for 3-5 seconds until the power button or WPS button light starts flashing.
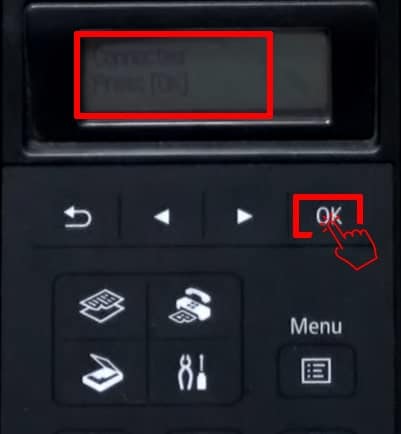
- Once you’ve done that, your printer will say Press [OK], so click it.
- Click on the Setup icon again, and you will see a WiFi icon with a signal bar that quickly disappears. This means your printer is now successfully connected to your wireless network.
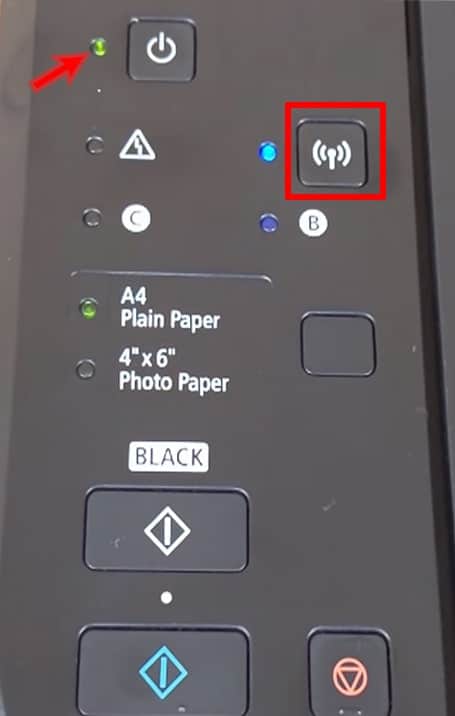
If your printer has a dedicated WiFi button and no LCD control panel, follow the steps below to establish a WPS wireless connection.
- Press and hold the WiFi button until the power light flashes.
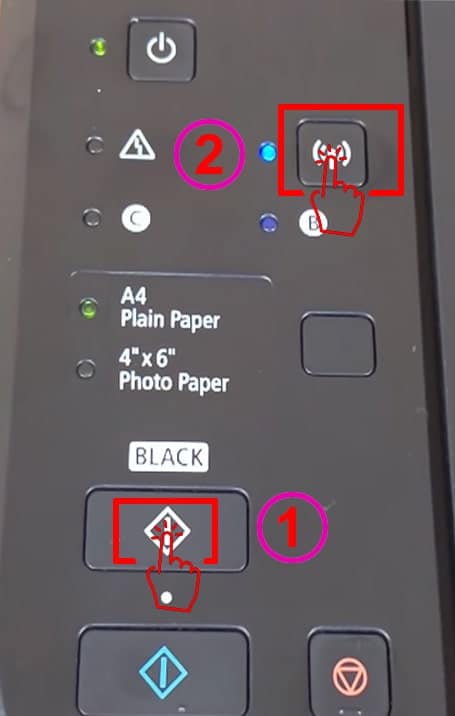
- Now press the Black button first and then the WiFi button. You should pay attention to the WiFi button light; ensure that it flashes rapidly while the power button is lit.
- Within two minutes, hold the WPS button on your router for 3-5 seconds until the WPS button or power button starts flashing.
- In a few seconds, your printer’s WiFi button will flash a blue light, indicating that it is establishing the connection. Once the connection is established, the Power button and WiFi light will stop flashing.
To confirm WPS connection, print the Network Configuration Page.
- Turn on your printer, then load two plain sheets of paper
- Press and hold the WiFi Button until the power light flashes once.
- Just press the WiFi button once, and your printer starts printing the network configuration page. In this document, you’ll find information about your wireless network and its name, which confirms that your Canon printer is now connected.
Note: WPS buttons are usually labeled as WPS on routers, but some manufacturers call them Sync buttons. If your router has a Sync button, that’s your WPS button. The WPS button may be on the front or back of your router, so make sure to refer to your router documentation for such information.
In case your router doesn’t have a WPS or Sync button, then follow method 2 for connecting the Canon wireless printer to a wireless network.
#2 Connect Canon Printer To WiFi using Smartphone
Smartphones can also quickly connect Canon wireless printers to a wireless network.
Here are the steps for LCD control panel printers:
- First, download and install the Canon Print Inkjet/Selphy App from the Play Store or App Store.
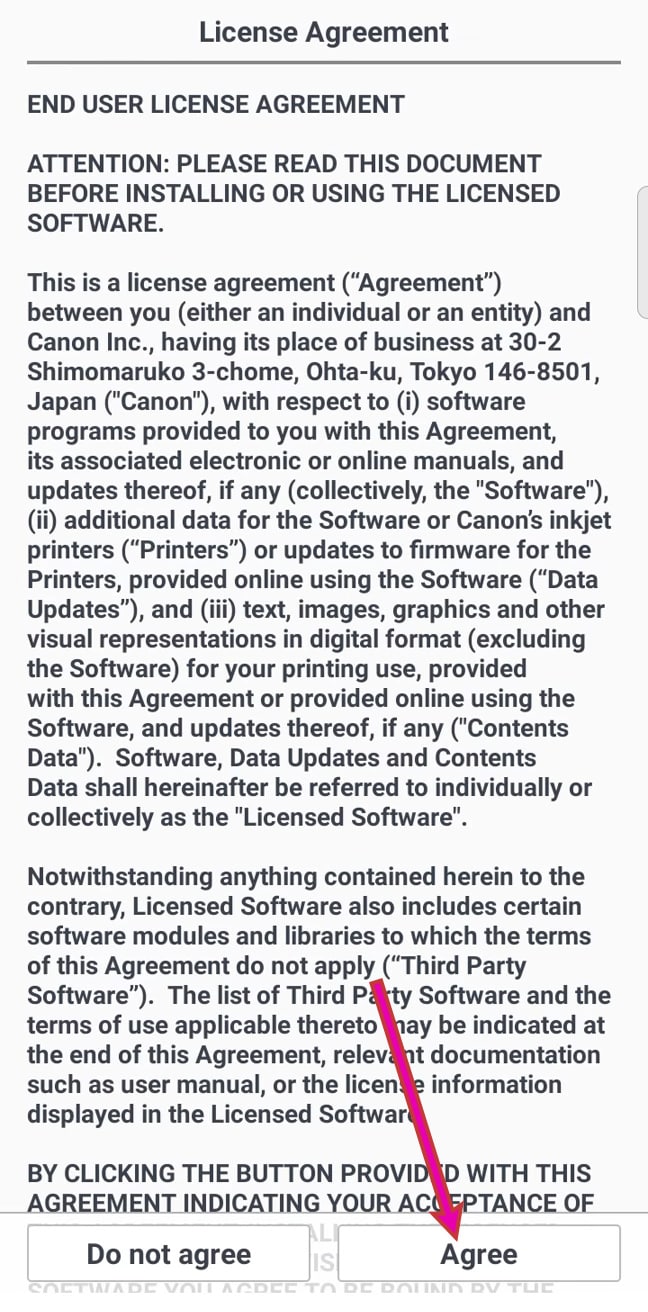
- Open it, and click “Agree.” The agreement will appear twice, so click on it twice and then click OK.
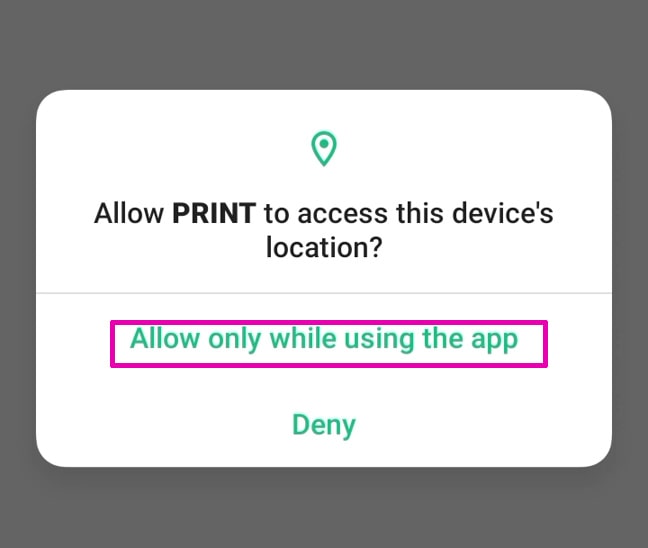
- After that, the app will ask you for specific permissions. Tap “Allow only while using the app” or simply “Allow” to grant the desired permissions.
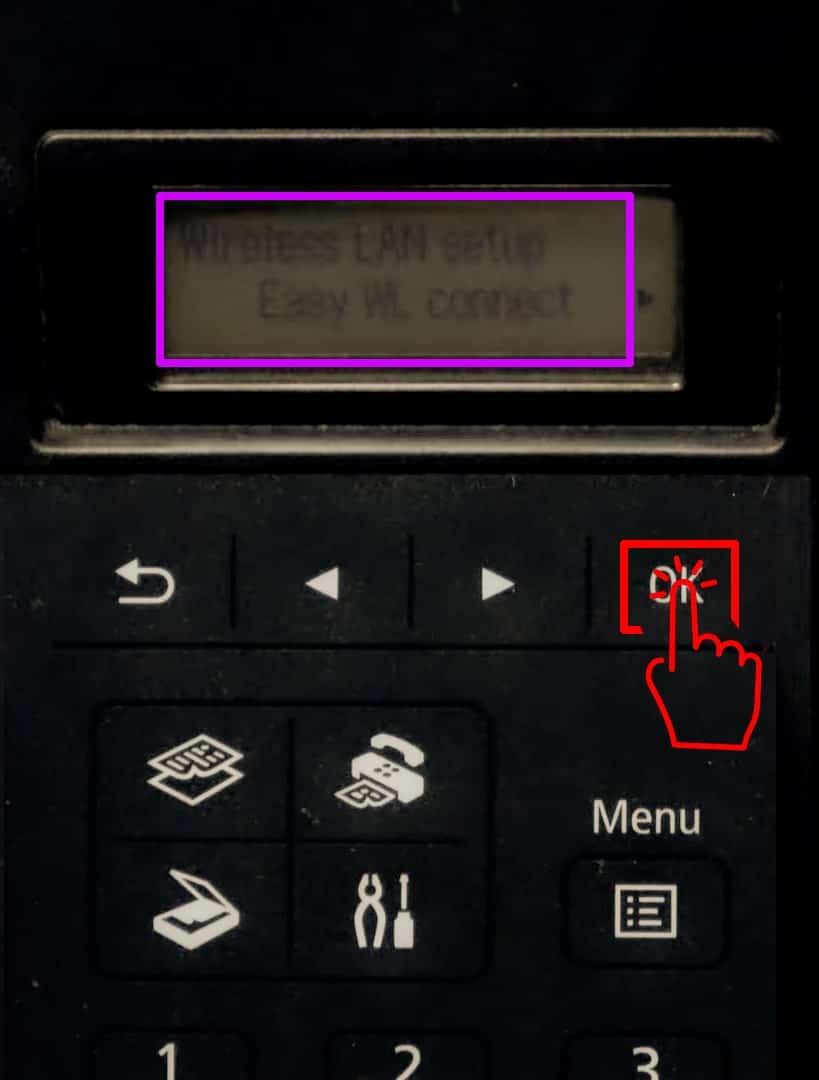
- Then turn on your printer, click the setup button, and wait a second for the LCD screen of your printer to display information. Select Wireless LAN Setup and click OK.
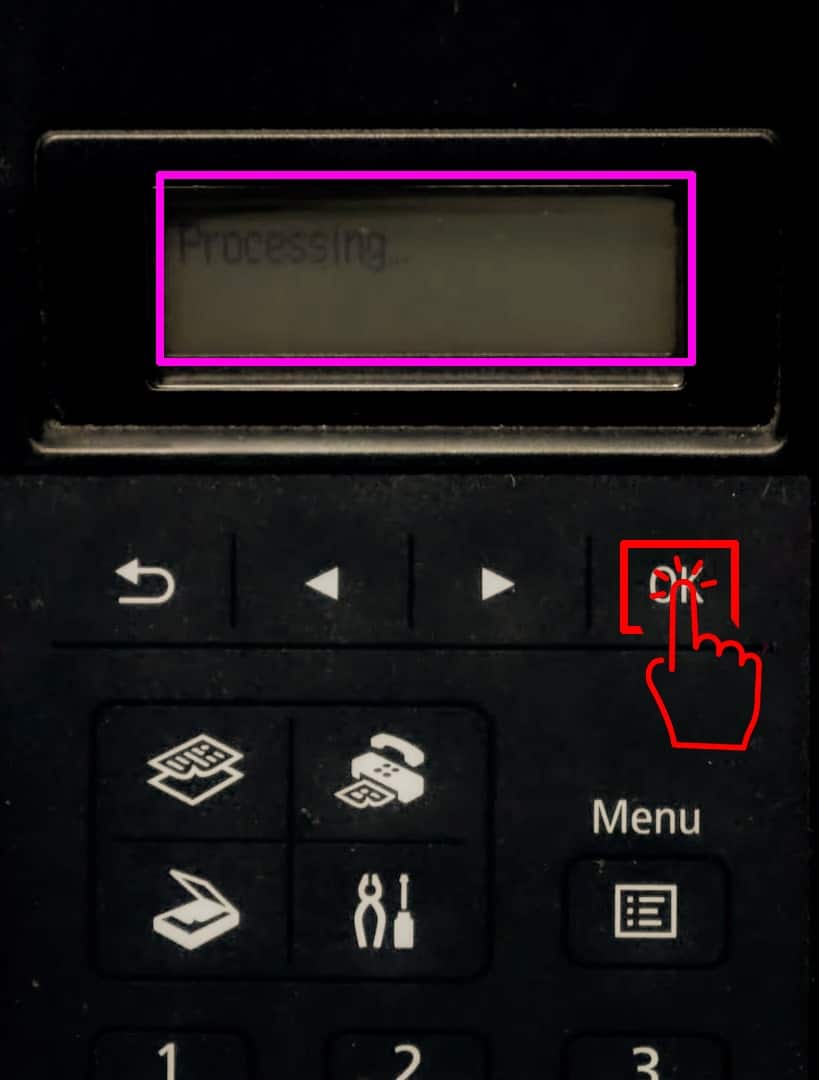
- Navigate (Using <> buttons) to select Easy WL Connect, and click OK on your printer.
- The screen will now say processing. Next, get back to your phone.
NOTE
You need to know how to start the “Easy Wireless Connect” mode on your Canon printer. This is known as a cableless setup on some Canon printers. However, both work exactly the same, and you must use Easy WL Connect or Cableless setup mode on your printer to use the Canon Mobile App.
- You should turn on your printer and start either the Easy Wireless Connect setup or the Cableless setup on your printer.
- Depending on your printer model, you can hold down your printer’s WiFi button until the Power light flashes twice. Then release the WiFi button when the second flash occurs, and your printer is now ready to be received by Mobile.
- If your printer has a link button, press and hold it until “processing…” appears on the screen, then release the button, and your printer is now in Easy wireless connect mode.
- You may need to refer to your printer documentation if you are unsure how to start Easy Wireless synchronization on your printer.
- After starting the Easy WL connect or cableless service, open the Canon App.
- You will be presented with an option: “Do you want to search for available printers?” Select Yes. It will begin searching for available printers. If you don’t see an option to search for available printers, click “Add Printer” at the bottom (top) of the app, and that should do the job.
- The app will keep searching for the printer in the hope of getting signals. This process could take a few seconds, so have patience.
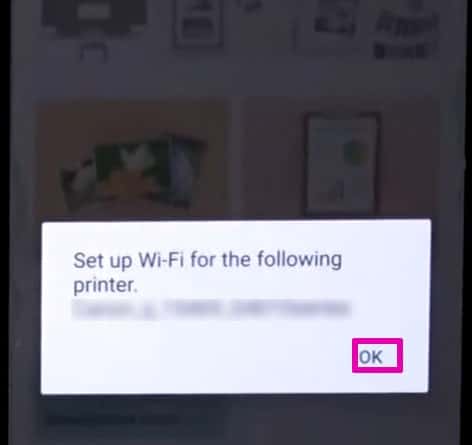
- Upon finding your printer, it will ask you to “Set up WiFi for the following printer (your printer name).” Click “OK.”
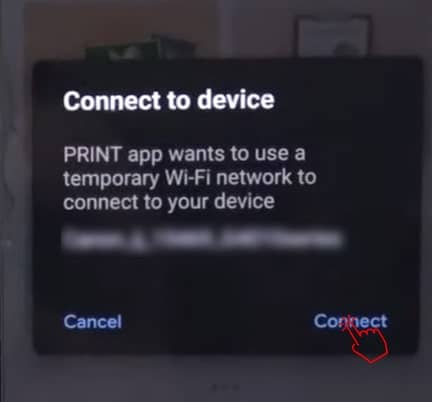
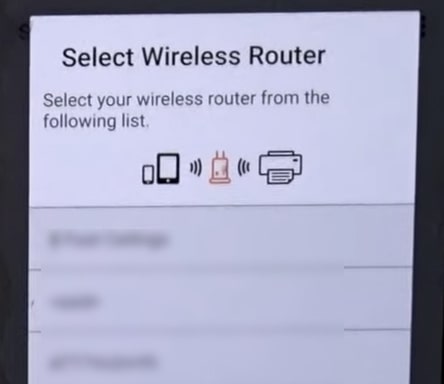
- Then click on “Connect.” It will open a list of available wireless signals (access points or WiFi names).
- Choose your Wireless router, tap on it, enter your WiFi password, and click OK.
- As a result, the app will say, “setting information has been sent.” The app actually sends wireless network information to the printer to let the printer search for the WiFi network and connect to it.
- Click OK on the App, which will display “communicating with the printer.” Please wait momentarily.
- After a few seconds, your printer LCD will display “easy WL is connected; please press OK,” so click OK. Your Canon printer is now successfully connected to your WiFi.
- To confirm the connection, click the setup button on your printer. You’ll see a WiFi icon with signal bars indicating your printer is connected to WiFi.
#3 Use WPS Pin to connect Canon Printer to WiFi
If your wireless router supports WPS PIN technology, you can use the PIN (Personal Identification Number) to establish a wireless connection with your printer.
In this process, your printer will generate an 8-digit WPS PIN that you will need to enter into your router in order to configure the wireless connection.
The following steps will show you how to generate the WPS PIN on your Canon printer so that you can connect it to your wireless router:
- Be sure you are familiar with your wireless router’s settings and information before entering the WPS PIN code. If you need help determining where to enter the WPS PIN on your wireless router, consult the instructions manual.
- Now switch on the printer.
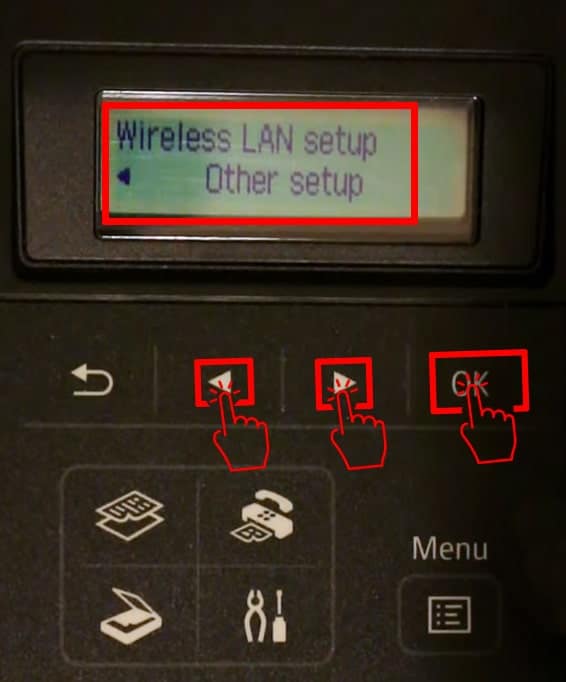
- It depends on the printer model, but you can usually generate the WPS PIN for most Canon printers by clicking the Setup button (which has a screwdriver and brush icon together). Then wait for a few seconds, and you’ll see “Setup Menu, Wireless LAN Setup” Press the OK button.
- The printer display will now say, “Searching for wireless router.” Wait for a moment, and press the Stop button once you see the text moving on the screen.
- Under the setup menu, select WiFi setup and click the OK button. Now use the (<>) buttons to select “Other Setup” and press the OK button.
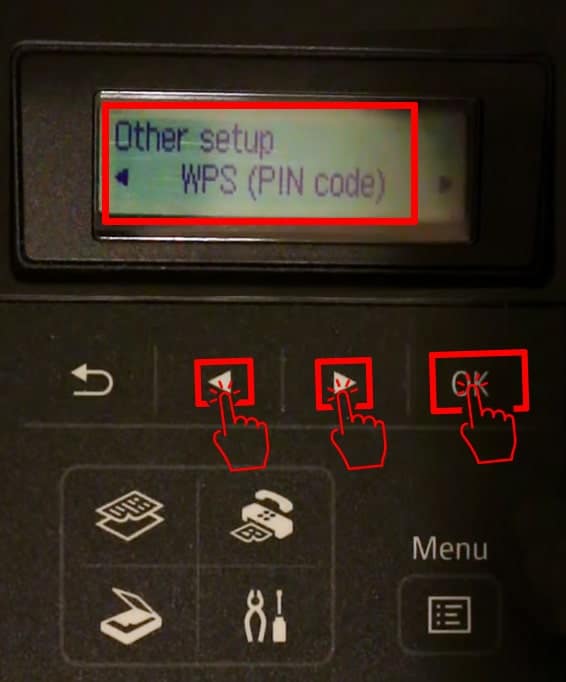
- Once again, use the arrow keys (<>) to navigate to WPS (PIN Code), then press OK.
- Now your printer will say “processing…”
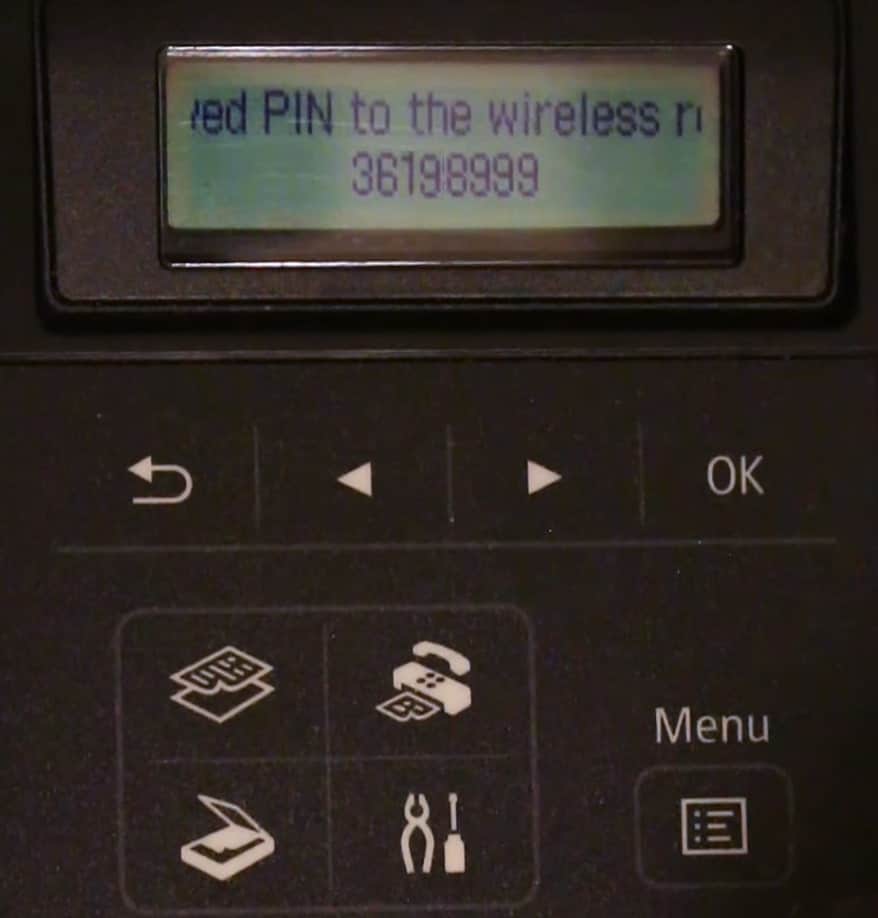
- In a few seconds, your printer will display the generated WPS PIN.
The WPS PIN is valid for 120 seconds, after which it will expire. But don’t worry. You can always go back to generate another PIN. Each PIN code generated will be unique.
Next, you will have to enter the WPS PIN into your router’s web-based configuration. If you don’t know how to enter the WPS PIN code on your router, check the instructions in your router’s manual.
- As soon as you enter the WPS PIN code into your router, your printer will attempt to connect to your router and display “connecting…”.
- After a movement, your printer will say, “Connected Press [OK].” Therefore, press OK. Congratulations, you’ve now successfully connected your printer to your wireless network.
If your printer doesn’t have an LCD screen but has a Wireless button or Information (i) button, then you can generate the WPS PIN as follows:
- To begin, insert two sheets of plain paper into the tray, and switch on the printer.
- Hold the WiFi button on your printer for 2-3 seconds until the power button light flashes.
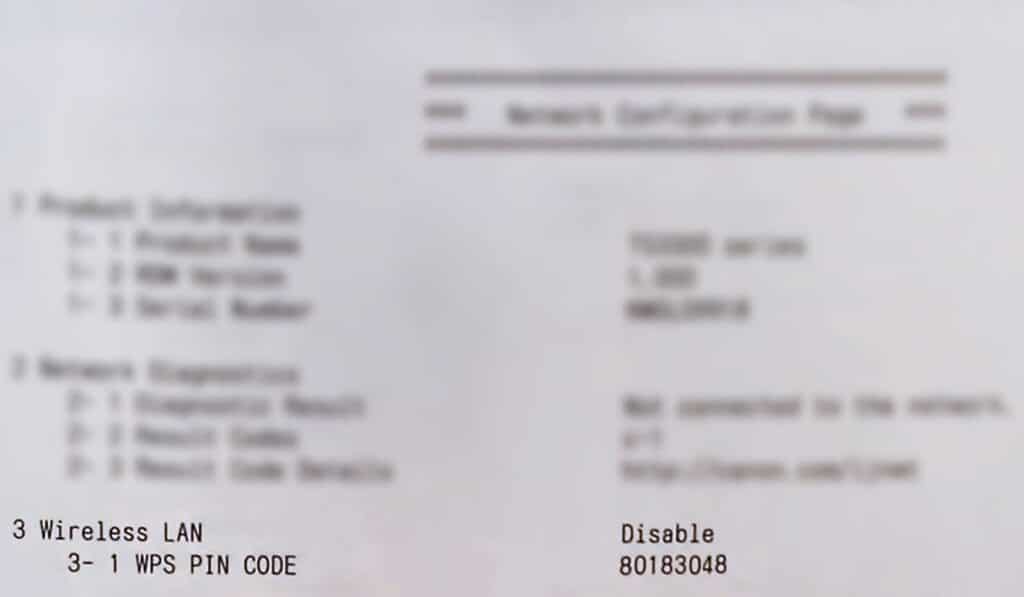
- Again press the WiFi button. This will print the network configuration page of your printer, which contains information about the WPS PIN code.
- OR, if your printer has an Information (i) button, press it for 3 seconds and release it. This will print the network configuration page, which will contain the WPS PIN code of your printer.
- To prepare your printer without LCD for WPS connection, hold down the Stop button until the power light flashes 16 times. On the 16th flash, release the Stop button.
- Then, access your wireless router’s network settings with your computer or mobile device and enter the WPS PIN code generated by your printer.
- As soon as you enter the WPS PIN of the printer into the router, the printer will attempt to establish a wireless connection. In a few seconds, your printer will be connected to your wireless router.
If you cannot access your wireless router and it does not have the WPS button, you can use the following method.
#4 Manually Connect Canon Wireless Printer to WiFi (LCD Printers)
The Canon printer’s LCD screen allows you to manually enter your WiFi password, just as if you were connecting your smartphone to WiFi.
Here are the steps to manually connect a Canon wireless printer to a wireless network
- Turn on your printer, and press the setup button. If it does not have a setup button, press the Home button.
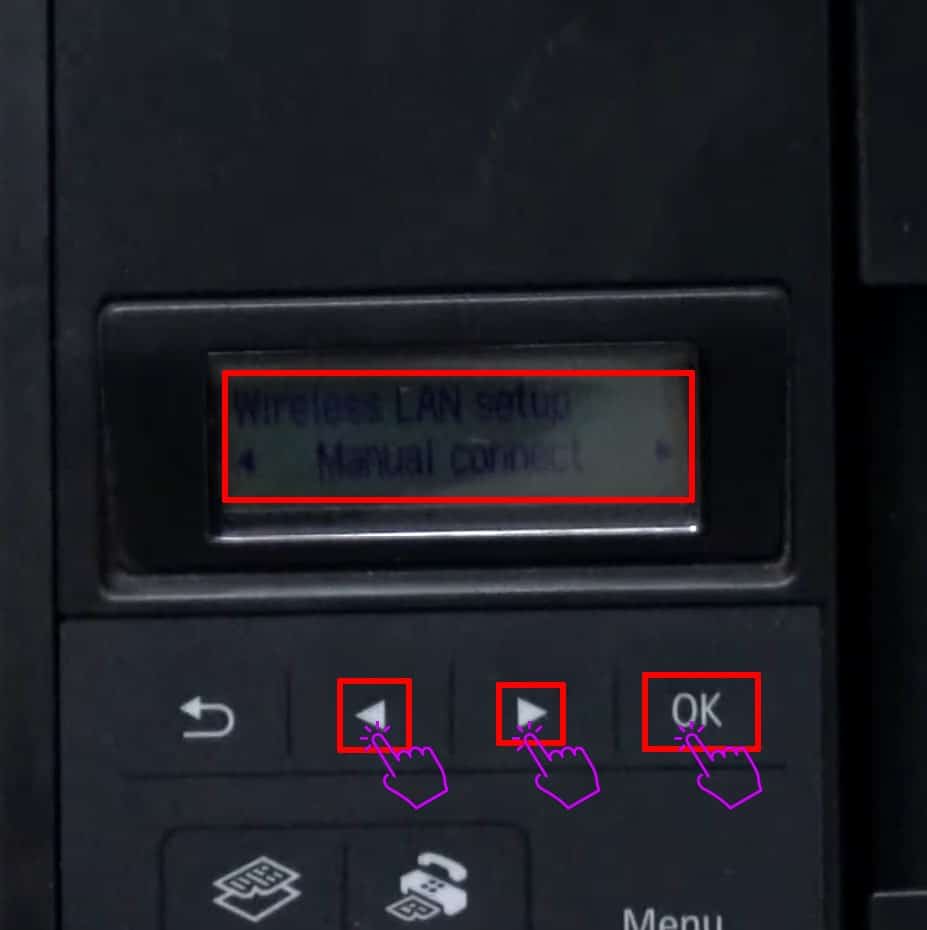
- Use your printer’s arrow keys (< or >), select WiFi or Wireless LAN Setup, and press the OK button.
- Once again, use the Arrow buttons to locate “Manual Connect,” and then press the OK button. The printer will then begin searching for wireless networks. Make sure your printer is within range of your wireless router.
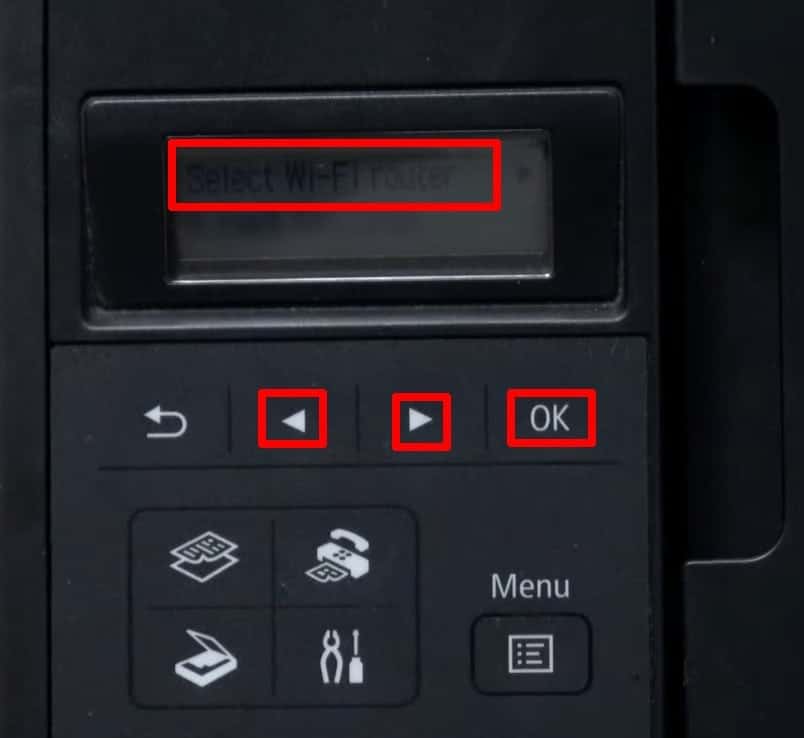
- Select your WiFi. Use the arrow buttons to see the next option, then press OK to confirm. It will select your network and ask for your password.
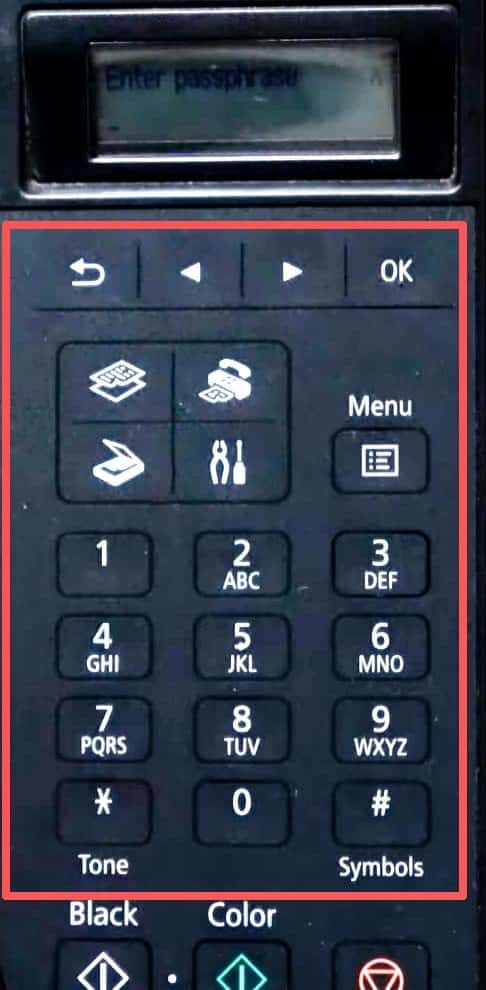
- Use the number pad on your printer to enter your WiFi password.
Tips
The back button on your printer will help you delete a character.
Your printer is set to lowercase by default. To change the character to uppercase, press the asterisk (*) button on the printer. This can be seen on the right side of the LCD screen.
If you want to enter numbers, just press the asterisk (*) button again. This way, you can enter different characters, such as numbers, uppercase, lowercase, and special characters if your WiFi password contains them.
- If you have accurately typed your WiFi password, hold the OK button for two seconds, select Yes, and press OK again.
- Your printer will now display “Connected Press [OK].”
- All done; your wireless Canon printer is now connected to WiFi.
Generally, a printer that fails to connect to your wireless network means you entered the wrong password; in this case, press the OK button, press the back button, and then type your password again.
Wrapping Up!
Hopefully, my guide helped you on how to connect Canon printer to WiFi, and now you’re connected.
The WPS push button is the easiest way to connect any Canon printer to WiFi, but unfortunately, some routers out there might not have the WPS button, but most routers will have. So make sure your router has the WPS button before you use the easiest method to connect your printer to it.
If your router lacks a WPS or Sync button, the most convenient option is to use the Canon Mobile Print app. It makes it easy and convenient to connect any Canon wireless printer to a wireless network.
Also Read: Guide to load Paper In Canon Pixma mx922
Also Read: How to Connect Canon Printer To Chromebook

